This document pertains to HP or Compaq PCs with Windows Vista and an HDMI (High-Definition Multimedia Interface) connector for connecting a monitor or TV.
You can connect a monitor or television to your computer as the primary display (monitor) or as the secondary display. This document describes how to connect a television to your Windows Vista computer using an HDMI connection on an NVIDIA GeForce or ATI Radeon graphics card in the computer, and how to use the card software to adjust settings.
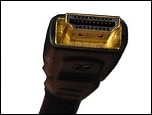
Figure : An HDMI cable connector

Figure : An HDMI connector

The graphics card in your computer may have more than one connector. Most graphics cards support connecting one or two displays at a time.
Figure : HDMI connector on an example graphics card

When you use HDMI to connect your display, you need to adjust some settings through Windows Vista to hear sound through the display (as described in Selecting HDMI as the default audio device in Windows Vista). Because of this, HP recommends that you connect analog speakers to the computer Audio Line Out connector if you want to hear sound during the initial setup of the computer.
How to connect a monitor or TV using an HDMI connection
NOTE:
If you are viewing 1080P or higher video definition, use a category 2 HDMI cable.
If your display does not have an HDMI connector, see My display does not have an HDMI connector. in the Troubleshooting section.
To connect the display using an HDMI connection (and HDMI cable):
-
Shut down the computer. Turn off the monitor or TV.
-
Connect an HDMI cable to the computer and to the display.
-
Turn on the display, and select the HDMI input as the input source to view.
-
Turn on the computer.
Selecting HDMI as the default audio device in Windows Vista
Use the following steps to activate HDMI sound on your Windows Vista computer:
NOTE:
If you ever need to recover the computer operating system by using the Recovery Manager, repeat this procedure to activate sound for the HDMI connector.
-
Right-click the Volume icon (white speaker) on the taskbar.

-
Click Playback Devices.The Sound window opens.
-
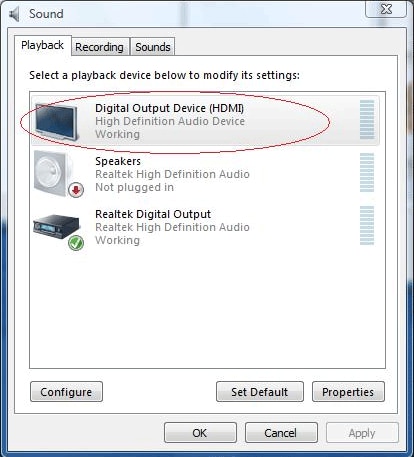
On the Playback tab, click Digital Output Device (HDMI) if it is present. If it is not present, click Realtek HDMI Output.Figure : Digital Output Device (HDMI) selection
 Figure : Realtek HDMI Output selection
-
Click Set Default.
-
Click Apply.
-
Do one of the following:
-
If you used Digital Output Device (HDMI), click OK to close the window. This completes the steps to activate HDMI sound for this option.
-
If you used Realtek HDMI Output, continue with step 7.
-
-
Double-click Realtek HDMI Output.The Properties window opens.
-
Click the Supported Formats tab.
-
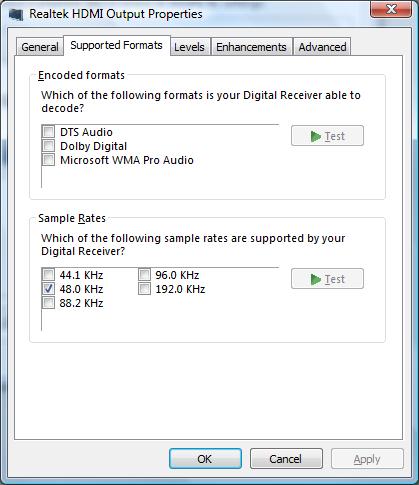
Place a check in the 48.0 KHz check box, and ensure that there is no check in the Dolby Digital check box and all other check boxes.Figure : Supported Formats settings in the Realtek HDMI Output Properties window

NOTE:
For most displays to play back audio, the sample rate must be 48.0 KHz. -
Click OK to apply the changes and close the window. This completes the steps to activate HDMI sound for this option.
Join us for more🥰