Google Photos continuous to win hearts among consumers. One of the prime reasons for Google Photos’ striking popularity is seamless sharing with Partner Account and social sharing.
Over the years, the company also introduced robust photo and video editing tools to make changes to media without leaving the app. Read along to learn the six best tricks to edit videos on Google Photos.
If you want to enjoy the best editing experience in Google Photos, we advise going with Google One subscription.
Google already has some editing photo editing features kept exclusively for Google One users. We won’t be surprised if the company does the same for video as well.
With that out in our way, let’s start editing some videos in Google Photos, shall we?
Some Video Editing Features On Google Photos
1. STABILIZE VIDEOS
This one is most relevant to phones without OIS (Optical Image Stabilization). If your phone lacks OIS hardware, you might end up with shaky video output.
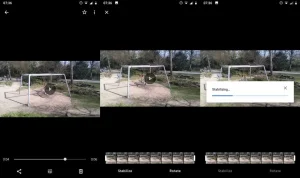
Google Photos has a neat Stabilizer that brings a much-needed smoothness to your shaky video. Here’s how to use it.
- Step 1: Open Google Photos on your phone.
- Step 2: Select a video that you want to edit.
- Step 3: If it’s available on your device storage, you will immediately see the video. Otherwise, Google Photos will download the video on the device.
- Step 4: Tap on the Edit button at the bottom.
- Step 5: Peek at the current video and tap on the Stabilizer icon beside it.
- Step 6: Let Google Photos run a stabilizer and make necessary changes.
The ETA to apply a stabilizer will depend on the length of the video. Check the output and if you are satisfied with the results, tap on Save copy at the bottom.
2. EXPORT A FRAME FROM VIDEO
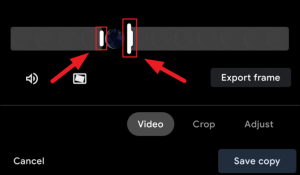
Want to capture that perfect moment from the video as an image? Look no more and use Google Photos video editor to export a frame from the video.
- Step 1: Open Google Photos and select a Video to open the editing menu.
- Step 2: Play a video in the editor and hit Pause to export the image
- Step 3: Tap on Export Frame and Google Photos will export it to the Camera folder on the phone.
3. PLAY WITH CROP TOOLS
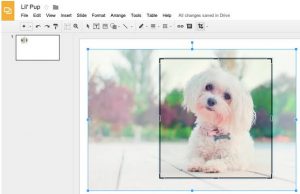
Similar to the image editor in Google Photos, the software has the same cropping tools for videos.
From the video editor, select Crop, and the app will let you make auto adjustments, rotate a video if you like, play with several aspect ratios, and more.
You have all the relevant crop tools to make changes in the video.
4. ADJUST VIDEO PROFILES
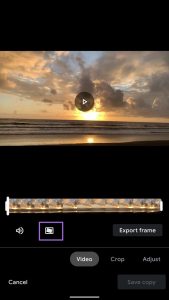
This one is mighty useful to make some last-minute changes to videos in Google Photos.
Open the video editor menu and select Adjust.The Adjust menu opens a host of editing features for a video in Google Photos.
For example, you can play with Brightness, Contrast, White points, Highlights, Shadows, Black points, Saturation, Warmth, Tint, Skin Tone, and Blue Tone.
One can also use the Vignette option and give their video classic movie reel effect. However, we mostly use the Saturation tool and tune the saturation high for eye-popping effect in the video.
5. APPLY FILTERS TO VIDEOS
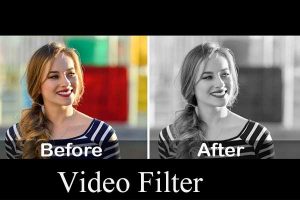
This one is our favorite and one of the most-used video editing tools to date. From the video editing menu, select Filters and play with various filters to make drastic changes to the video.
You can choose Vivid, West, Palma, Metro, Blush, and even apply the Black & White effect that delivers a retro look to the video.
If you want to further edit the video after applying a filter, you can go back to the Adjust menu and make the necessary changes.
For example, users can apply Vivid mode to the video and then tone up or down the saturation from the Adjust menu.
6. MARKUP TOOL
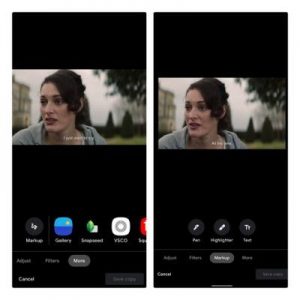
This one is most relevant to educational or informative videos. You can use the Pen or Highlighter tool and apply basic doodling to the video.
In most cases, you will end up using the Pen tool. Simply click on Markup and select Pen.
Select your preferred color and make some doodling on the video. Unfortunately, the writing or highlights are applied throughout the video and not to a single frame.
We can’t say you can edit a video like a professional. It’s nowhere near a full-fledged video editor for desktop, and that’s okay. Google isn’t targeting those users anyway.
The current video editing tools are meant for normal consumers. And the added functions should be more than enough.
It will be interesting to see how Google further enhances the video editing experience on for Android and iPhone.
Join Us On Telegram For More Exciting Updates
